Maybe you don't actually want to make a lamp, maybe you'd like to rewire an existing lamp. Many of the same steps apply.
You're dealing with an object that will ultimately use electricity. If you have any doubts please consult a professional.
 |
| This is my lamp body. |
 |
| There needs to be a hole in the bottom for my tubing to go through. |
 |
| And a hole in the top for my tubing to come out of. |
 |
| This is the tubing I'm using. I'll run the lamp cord through it. |
 |
| I pushed the tubing through the bottom . . . |
 |
| and pulled it out of the top. |
 |
| Tighten the nut down over the washer. |
 |
| I fed the lamp cord through the hollow of the tube . . . |
 |
| and pulled it out of the top. |
 |
| I slid this wooden knob over the tube . . . |
 |
| and put a washer and a nut on it to hold it in place. |
 |
| I wanted a little extra height in my lamp so I screwed on this coupling . . . |
 |
| and threaded a nipple into it to add some height. |
 |
| To cover the threads of the extra nipple I added this 2" brass neck. |
 |
| This is called a saddle. I put a brass washer over it. |
 |
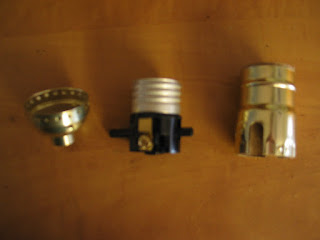
| This is a "push through" socket. |
 |
| I broke it down into three pieces. |
 |
| The bottom piece screws on over the saddle. |
 |
| Tie this knot into the lamp cord. It keeps the wire from being pulled loose. |
 |
| Pull it tight and down into the socket base. |
 | ||
| Attach the neutral wire (wide blade on the plug end) to the silver screw. |
 |
| Attach the hot wire (narrow blade on the plug end) to the brass screw. |
 |
| By pulling the lamp cord you'll pull the socket into its base. |
 |
| Push the socket down into the base. It's a snug fit. |
 |
| This is a harp. |
 |
| It attaches to the saddle. |
 |
| Poof! You just made a lamp. |

No comments:
Post a Comment